
The webchat is the chat button that appears in the corner of your website. Visitors’ messages arrive in Conversations, and the AI can answer straight away.
Create and install
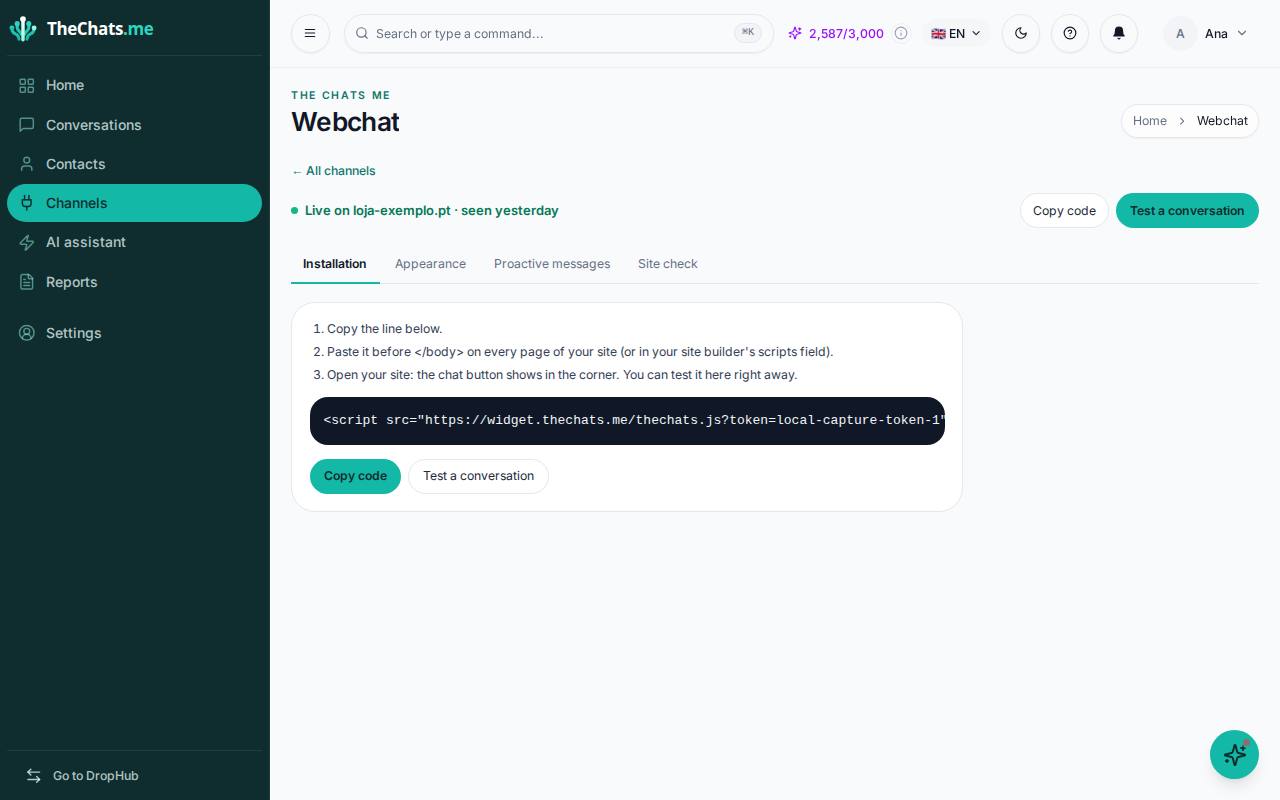
- In the menu, open Channels. On the Webchat card, click Connect if you do not have one yet, or Adjust if you have already created it.
- On the Webchat screen, in the Installation tab, click Copy code.
- Paste the line before
</body>on every page of your site, or into the scripts field of your website builder (WordPress, Shopify, Wix and similar). - Open your site: the chat button appears in the corner.
Not the person who manages the site? On Home, in the Install the webchat on your site step, you can send the instructions to whoever does.
Check that it works
The status appears at the top of the Webchat screen:
- Active on … — the chat has been seen on your site.
- Not installed yet: paste the code on your site — the code has not been found yet.
Click Test a conversation to open the chat as a visitor and send a message. It appears in Conversations.
Change the look
In the Appearance tab you choose the Main color, the Welcome message, the Assistant name and the Position on the site (left or right). On the right you see how visitors see the chat. Click Save at the end.
Hours, avatar, forms and the rest are in all channel options.
The other tabs
- Proactive messages: the chat speaks first, depending on what the visitor does (time on the page, exit intent and other rules).
- Site check: the performance and accessibility scores of your site’s pages.
If something goes wrong
- The button does not appear: check that you pasted the code on every page and that the site is not cached. Clear the website builder’s cache and reload.
- You see “This channel has no installation code yet”: open the channel in Channels to generate it.
Once it is installed, see Set up the AI Assistant so the AI answers with the right information.