
For anyone selling online, a chat on the site is often the difference between answering the question that closes a sale and losing the visitor to another tab, where they’re already comparing prices with a competitor. The trouble is that many stores treat “adding chat to the site” as an IT project — waiting for a developer to be free, or giving up halfway because it looks more complicated than it actually is. You can have a working chat on your store’s site in a few steps, with no code required.
Create your account and your webchat channel
Sign-up starts on the Free plan, with 2 agents and 1 channel, no credit card required — setup takes minutes. Inside the dashboard, the first step is creating the webchat channel, which today is the only channel available to new accounts (WhatsApp, Instagram, Facebook Messenger, Telegram and email are still “coming soon,” so it’s not worth building your store’s support plan around them yet).
It’s worth looking at the product page before configuring anything, to see what’s part of the inbox beyond the widget itself — queue, history, CRM — and start thinking about how that fits the daily routine of whoever answers the chat.
Pasting the script: Shopify, WooCommerce, or your own code
Once the channel is created, the dashboard generates a script to paste into your site. If the store runs on Shopify or WooCommerce, the native integration cuts down the work of finding where to edit the theme; if the site runs on custom code, the script goes straight into the header or footer of the pages where chat should appear. The full list of connectors — including Shopify, WooCommerce, HubSpot, Pipedrive and Google Ads — is on the integrations page.
As soon as the script goes live, the widget already comes with conversation history, document and image uploads, and a built-in GDPR consent banner — there’s no need to set that up separately or bolt on another tool just for the chat’s cookie notice.
Organizing the queue before the first conversation
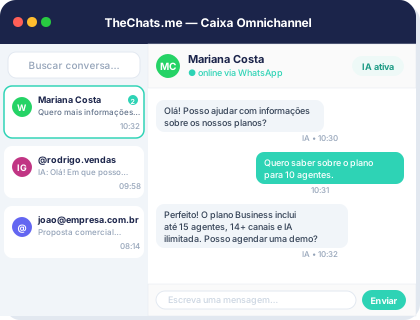
With chat live, the next step is deciding who answers what. On the Free plan, the 2 agents can already split responsibility — one handles pre-sale questions, the other post-sale, for example. The single queue organizes conversations by owner, tag and status, so no question gets stuck in a tab open on someone else’s screen.
A chat stuck on “awaiting reply” for hours is worse than no chat at all — a visitor who expected an instant answer walks away with a worse impression than one who never saw the option.
This is the stage where it pays to set, even informally, a maximum response time for the team: the queue shows what’s open, but someone still needs to check it regularly in the first days. The dashboard already includes daily message stats, which helps spot — without a spreadsheet — when chat volume peaks and whether the team can keep up at its current size.
If the store sells in more than one place — its own site plus marketplaces, for instance — it’s worth keeping webchat focused on the site itself: that’s where someone is already looking at the product and deciding whether to buy now or go check another tab.
As the store grows: AI, tickets, and sales integrations
The Free plan gives you the structure — channel, queue, agents — to get started from zero. As conversation volume grows, two features start to matter: AI that triages and suggests replies before an agent picks up the conversation, and a knowledge base with automatic escalation to a human when a question falls outside the script. Those AI features, along with commercial tickets with real-time SLA tracking, come with the paid plans — the Micro plan, for example, already includes 50 AI tickets a month.
It’s worth comparing plans once the store starts getting a steady flow of messages, to pick the right entry point without paying for capacity you won’t use yet.
Conclusion
Adding chat to your store’s site doesn’t take a month-long project: you can go from zero to an account, a webchat channel, a pasted script and an organized queue in the same day. The AI and automation upside comes later, once conversation volume justifies the investment. Create your free account and get webchat running today.